A bootable USB is useful in many ways. It can help you make your Windows OS portable. And this is not even its best feature. You can boot your PC with it, which is especially advantageous in case of an emergency. Say, there’s a virus or some other problem and the PC wouldn’t start. Having a bootable USB in such a case is a great rescue. It also helps in repairing your OS through recovery. Apart from that, you can always use a bootable USB drive to reinstall the operating system and start fresh. Since, it has so many benefits, its only smart to create bootable USB. So, here are instructions on How To Create a Bootable USB Drive From Windows10/8/7.
Related Article: How to create a Live USB with Linux Distros
There are different ways to create a bootable USB from Windows Operating system. There are several third-party software you can use or follow this. We will be using the media creation tool from Microsoft. This method will help you create a bootable USB drive for free. So let’s start the process to create a bootable USB drive.
Contents [hide]
Prerequisites
-
Use a blank USB flash drive with 8GB or more space.
-
It is recommended to use a blank USB because anything else will be deleted anyway.
Method 1: Using Microsoft Media Creation Tool
Download
Steps to follow to create a Bootable USB drive in Windows 10 Using Media Creation Tool
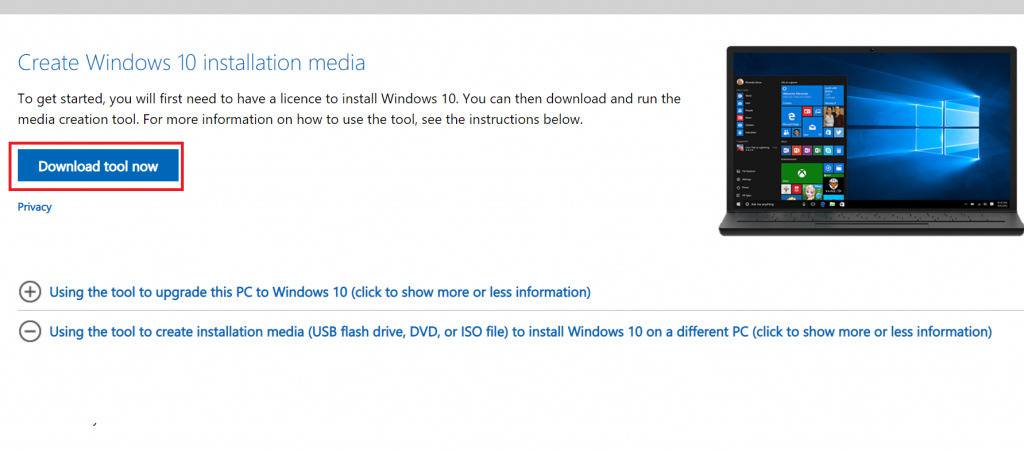
Step 1: The first step is to download the Microsoft Media creation tool. When you click on the above link, you will see the below page. Just click on the Download tool now to download the media creation tool. Select the folder and start the download. It shouldn’t take much time to download. Once the download is completed, click on it to run. It may take a few seconds to get to the license. Then click on accept to move forward.
Step 2: After the license agreement, you will get two options to choose from. The default option selected here is Upgrade PC. Now, you have to change it to Create installation media for another PC since we want to create a bootable USB. Then again click on Nex to move forward.

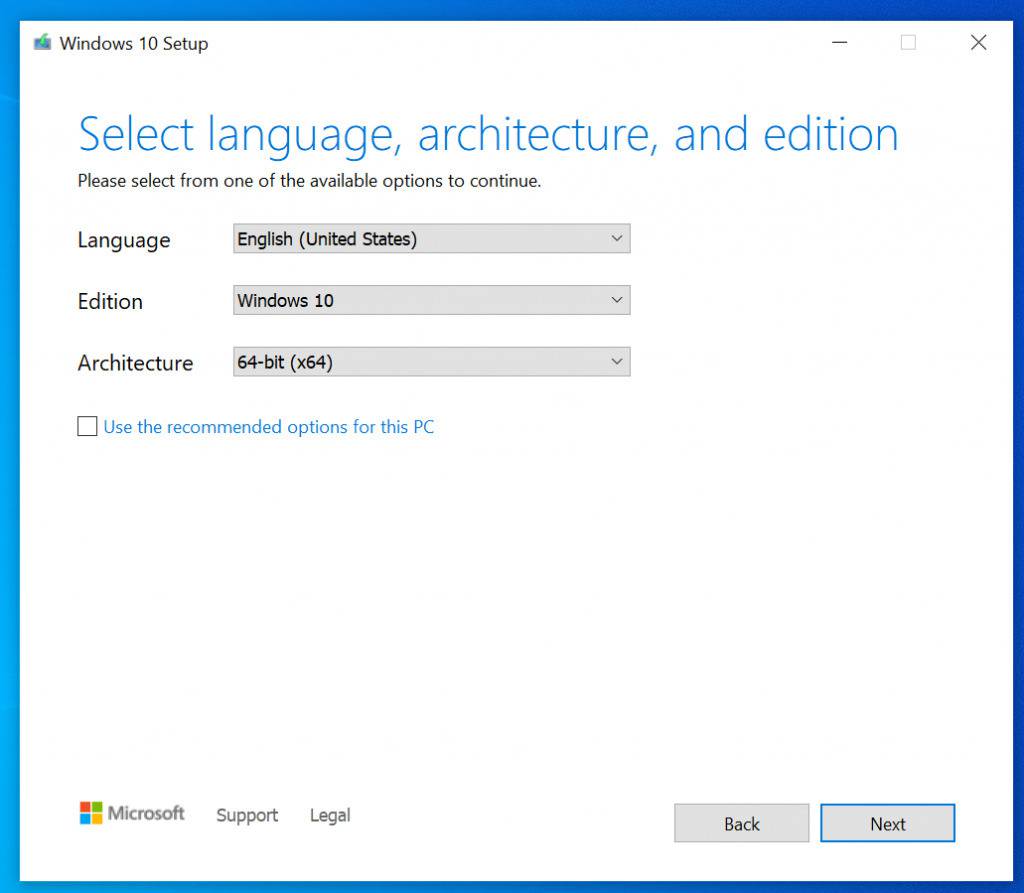
Step 3: The next slide lets you choose the language, architecture, and edition. You will see options are already selected. To change them, uncheck the box next to “Use the recommended options for this PC”. You can choose your preferred language. The option in the Editions depends on the Windows edition. For architecture, you get three options. You can choose between 64-bit and 32-bit if you are sure which one you are gonna need. In case, you want to keep both options open, Choose “Both”.
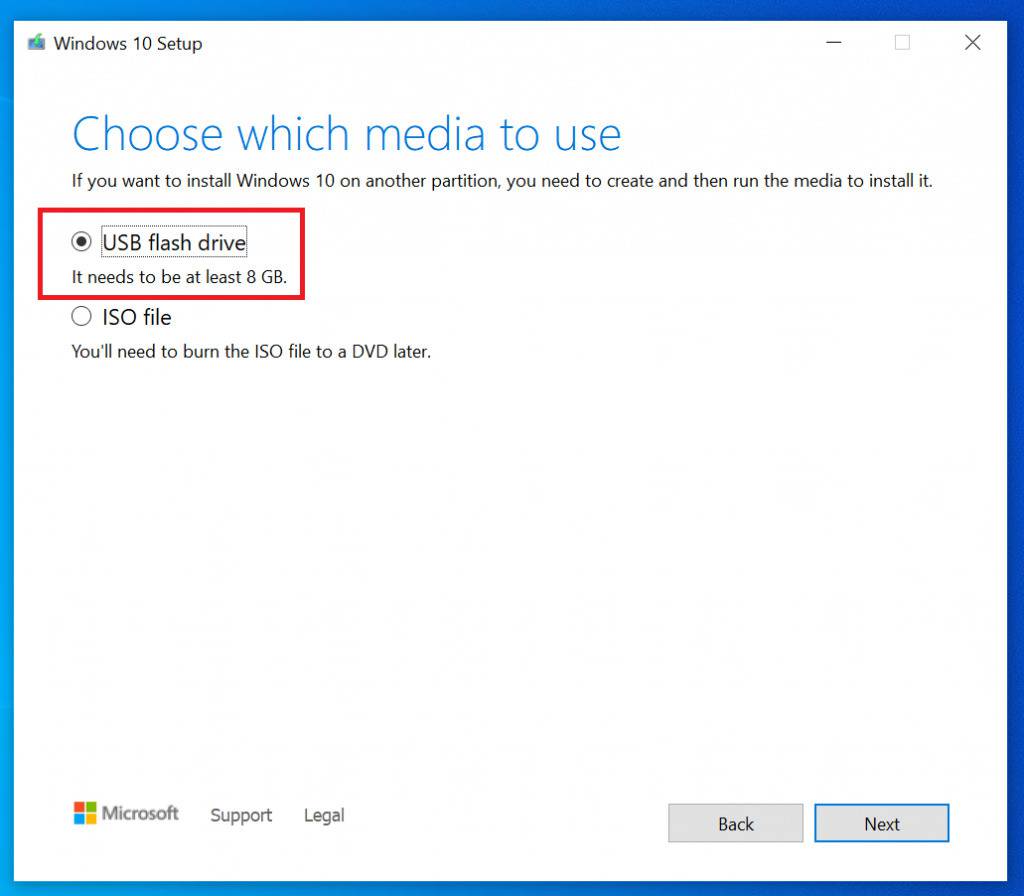
Step 4: Lastly, we choose the media. The USB flash drive is selected by default. So, we will leave it as it is and click on next. Then, select the USB flash drive you are using to create a bootable USB. This is the last step and you will see the finished message after the process is completed. It may take some time.
You have successfully created the bootable drive. Now you can use this to install your corrupted operating system or troubleshoot your operating system.
Method 2: Using Rufus (third-party application)
In this second method, we will use a third-party application called Rufus. It is a free application that helps you create a bootable USB from ISO. This means you have to download the ISO file first. For that, you can either use the Windows tool or download it from some other reliable site. You can download the ISO file for all three Windows with the media creation tool. Apart from this, there is a third option you can try. You can go to Windows evaluations and get Windows ISO for a 90 day trial period.
Downloads
-
DownloadWindows ISO file
Steps to follow to create a Bootable USB drive in Windows10/8/7 Using Third-party Application
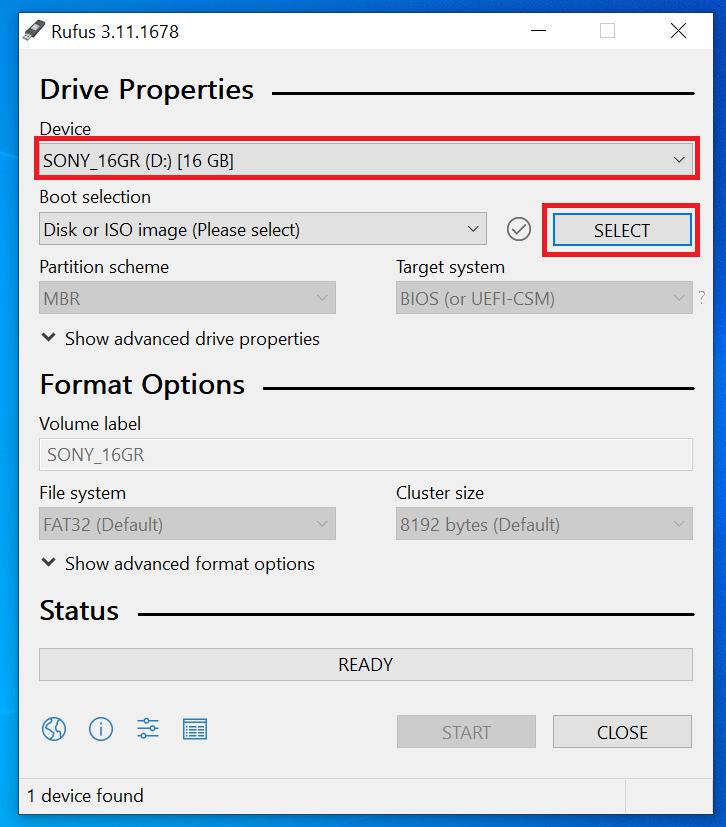
Step1: After the download from the above-given link is finished, go to the download location, right-click and open Rufus. On the top, under the Drive properties, you can select the USB you want to use by clicking on “Device”. Following that selection, click on the “SELECT” button to select the ISO file.
Step2: Next we will check out the partition scheme. You can check your partition scheme for this. Just use Windows + X and go to Disk management. Then right-click on “Disk 1” and Properties>> Volumes. Select the partition scheme accordingly. Now moving to Format options. You can change the name Volume Label if you want and it is recommended to leave the rest as default. Finally, click on the START BUTTON.
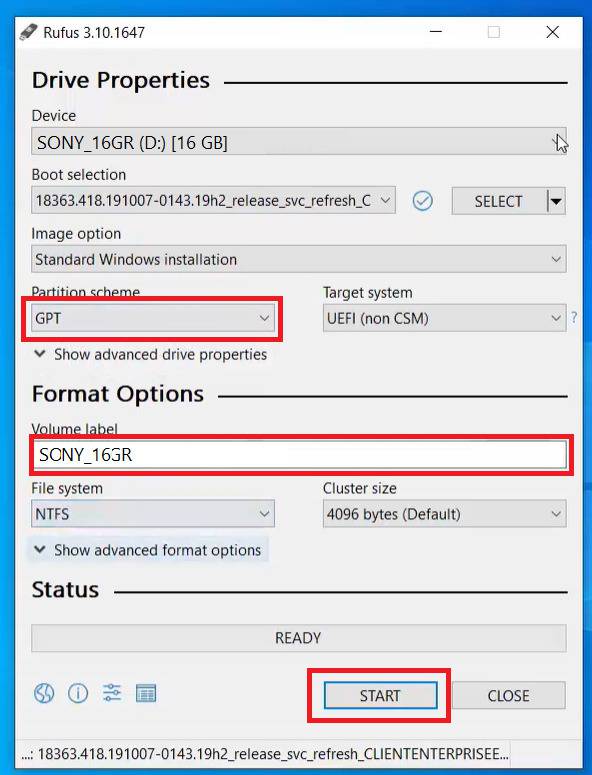
Step3: After you click on the start button there may be a warning sign about formatting your USB drive. It is better to use a formatted one. Click ok to move forward and start the process. It may take some time to complete.
Create a bootable USB with some other external tools
There are lots of other tools available to create a bootable USB drive. Below is a list of some reliable tools that you can use to create a bootable USB drive from Windows10/8/7.
-
WiNToBootic: It is a free tool and does not require installation. You can check it out here.
-
Universal USB Installer: This tool is also not required any installation. You can use it after downloading the tool. Download the Universal USB Installer from here.
-
UNetbootin: It is another free tool and it works for window and Linux both. You can download it from here.